Fall means all the comforting apple and pumpkin treats including homemade Apple Fritters! A simple yeasted dough that is folded together with sweet cinnamon apples, then deep fried and glazed. They are sweet perfection. The neighborhood donut shop ain’t got nothing on these. Try my seasonal Pumpkin Cake Donuts, too!
MY LATEST VIDEOS
A Few Apple Fritter Basics
Before we dive deep into this recipe, I thought I would address some elementary things we need to begin:
Are Apple Fritters Donuts?
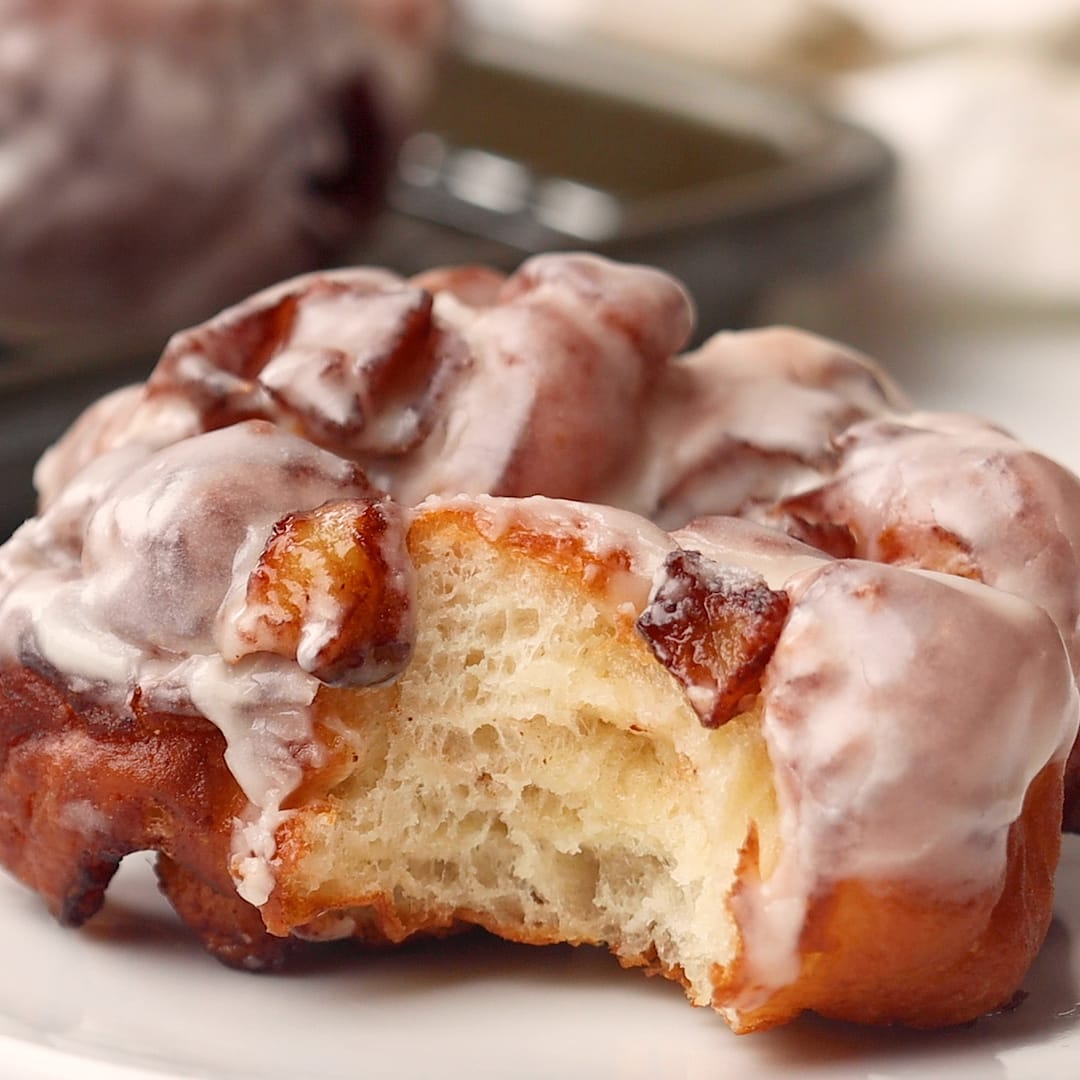
While Apple Fritters aren’t your typical cake or yeasted donut, they are certainly donuts! I use a yeasted donut dough, fill it with cooked and sweetened cinnamon apples, form it into fritters and give them a quick fry in my dutch oven on the stove. Finish it off with a quick powdered sugar-vanilla glaze and voila! The perfect homemade apple fritter. I’m on board with anything fried but these are seriously next level.
Should I Cook the Apples?
While older, more traditional apple fritter recipes call for using raw apples, I don’t like using raw apples. They don’t stay in the fritter very well and they stay crunchy even after being fried. Hard pass. I like to cook mine first with some cinnamon sugar, then form my fritters, then fry.
The Best Apples for Apple Fritters
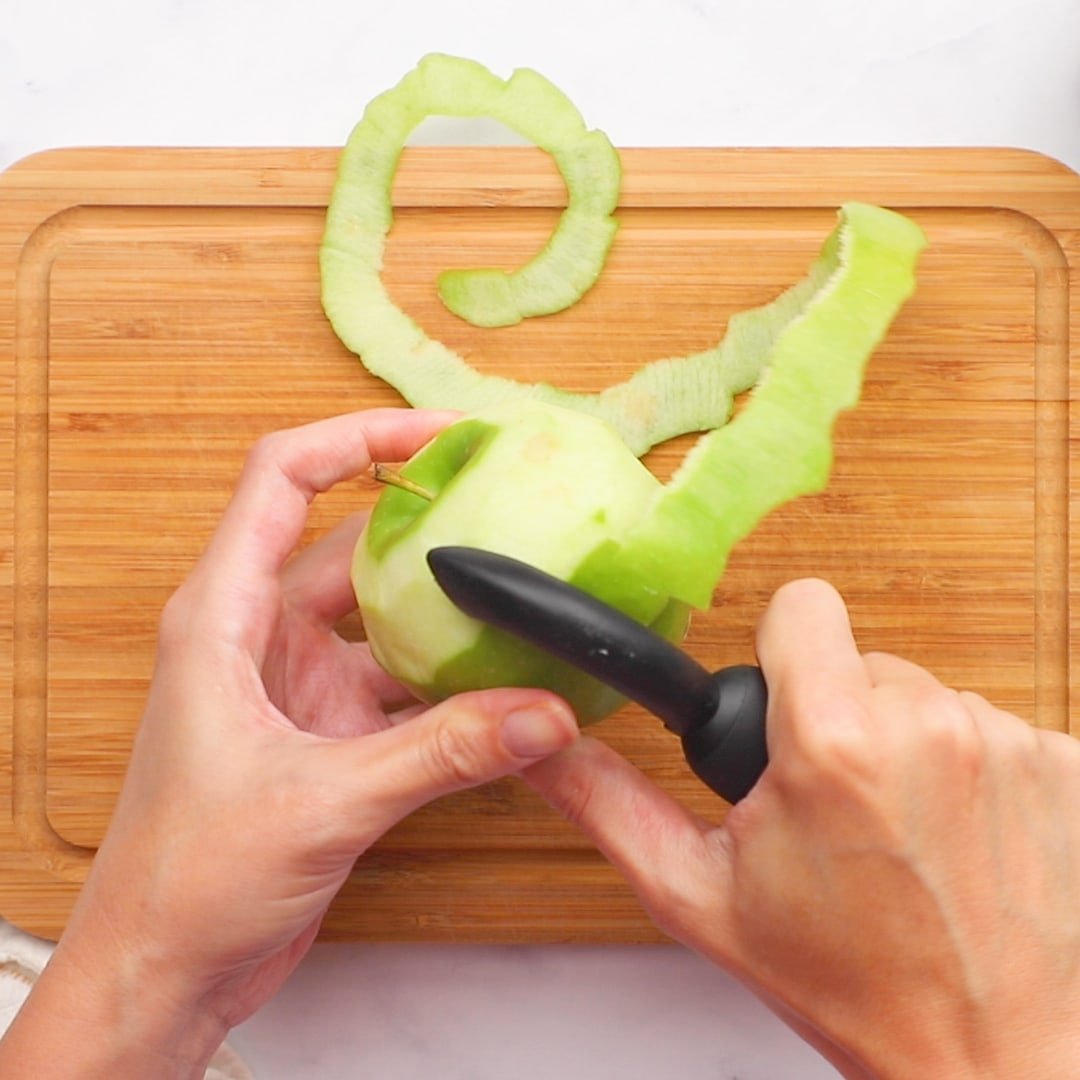
With any baked good, I always recommend Granny Smith apples (the green ones at the store). They are tart, hold their shape and have a great texture after baking. I suggest using them for apple pie, apple crisp and apple cake too. They are the best.

Ingredients Needed for Apple Fritters
Just a few basic ingredients come together to make these old-fashioned apple fritters. Here’s what you need:
- Bread flour – For that perfect, slightly chewy texture.
- Warm milk – Helps activate the yeast.
- Active dry yeast – The key to fluffy dough.
- Granulated sugar – Adds a touch of sweetness to the dough.
- Butter – Melted and cooled to keep the dough soft.
- Granny smith apple – Peeled and chopped for that tart apple flavor.
- Cinnamon sugar – For cooking the apples to apple pie-like perfection.
- Vegetable oil – For frying the fritters to a deep golden brown.
- Powdered sugar glaze – A simple mix of powdered sugar, whole milk, vanilla extract, and melted butter to drizzle on top.
Variations
- Honeycrisp apples – Swap granny smiths for honeycrisp for a sweeter bite.
- Brown sugar – Add a bit to the apple filling for a richer flavor.
- Oil – Try frying in peanut oil for a higher smoke point.
- Zucchini fritters – Feeling adventurous? Swap apples for zucchini for a savory version.
- Air fry – Looking for a healthier option? Air fry instead of deep frying.
How to Make Apple Fritters
Any homemade donut is a labor of love. My homemade apple fritters are no exception! But mama will they be worth it! There is nothing hard about this recipe, it just takes time. Also, be prepared for your house to smell like fried food for a good 24 hours. It’s totally normal. See my tips for getting rid of that fry smell below. For full recipe details, including ingredient measurements, see the printable recipe card at the bottom of this post. Here are my step by step instructions for making the best apple fritters:
1. Make the Yeasted Donut Dough
If you’ve ever made cinnamon rolls or homemade bread before, you can make this dough. The methods are all extremely similar. Proof the yeast in warm milk and a little granulated sugar. Set it aside to proof and then add in the remaining sugar, melted butter, bread flour and salt.
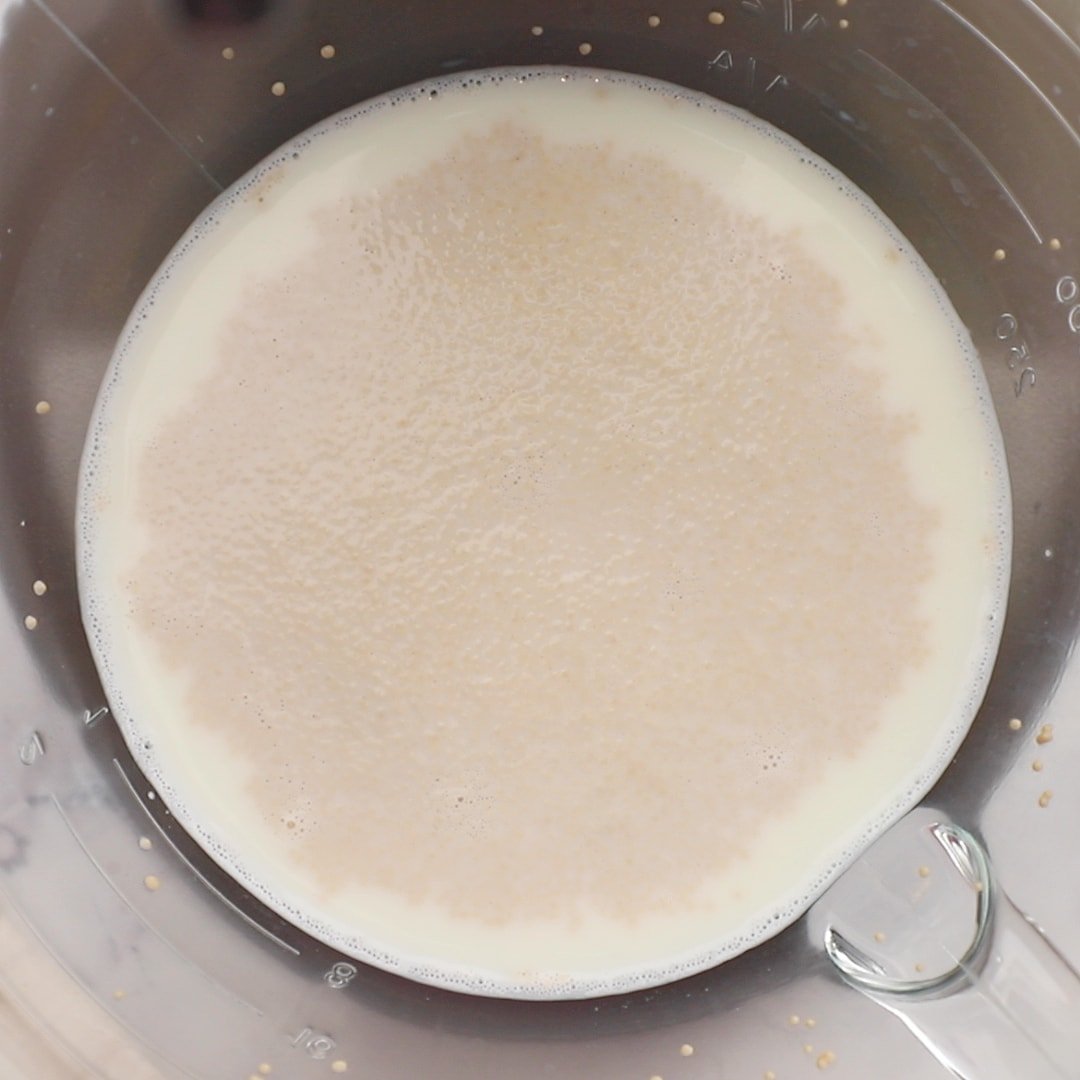


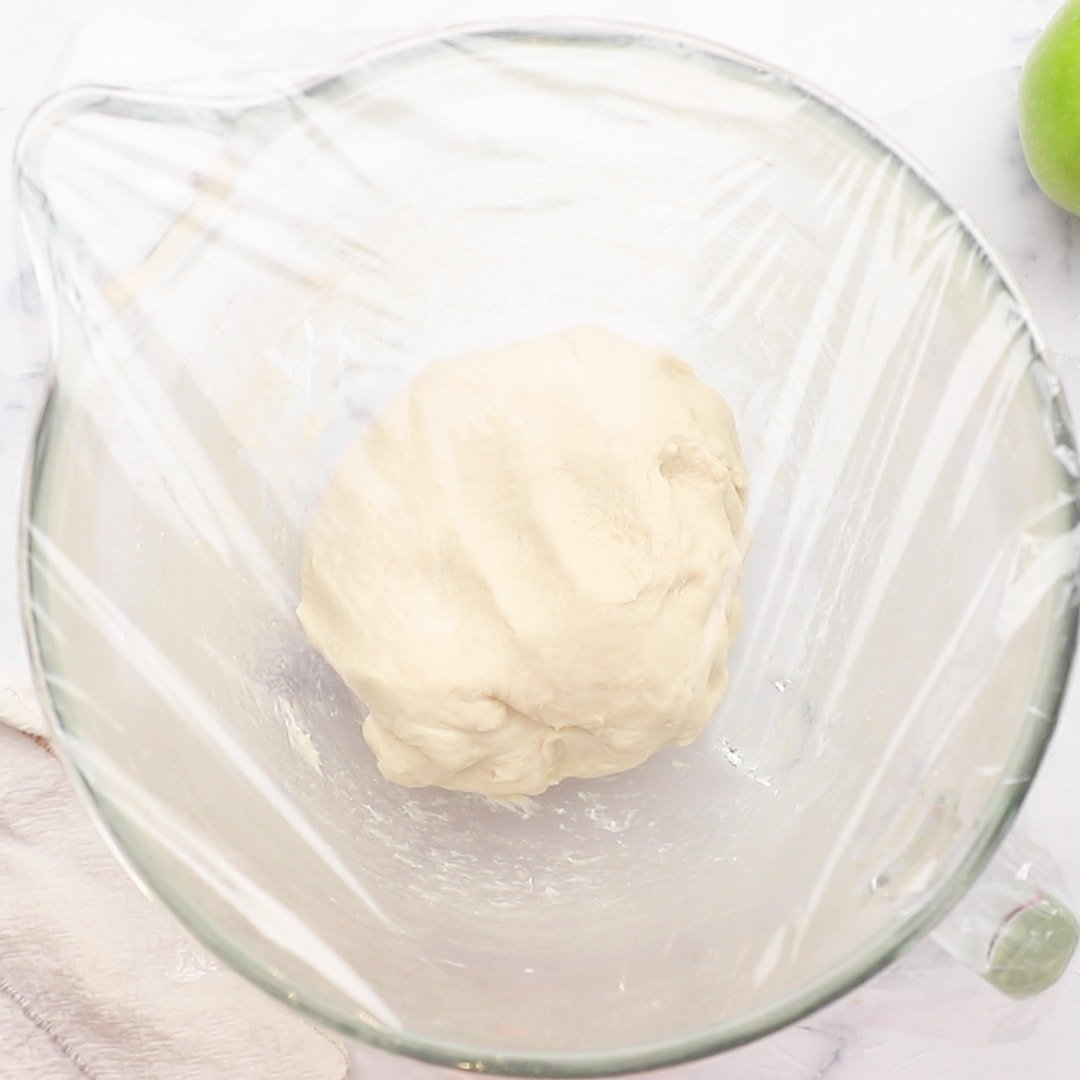
What to look for: Your dough should come together on the dough hook, the bowl should be mostly clean and the dough itself should be smooth and feel tacky but not sticky enough to leave a residue on your hands. Set this aside to rise.
2. Cook the Apples
While the dough is rising, peel and dice one large granny smith apple. Cook in a little butter with some sugar and cinnamon until the apple pieces are mostly tender.
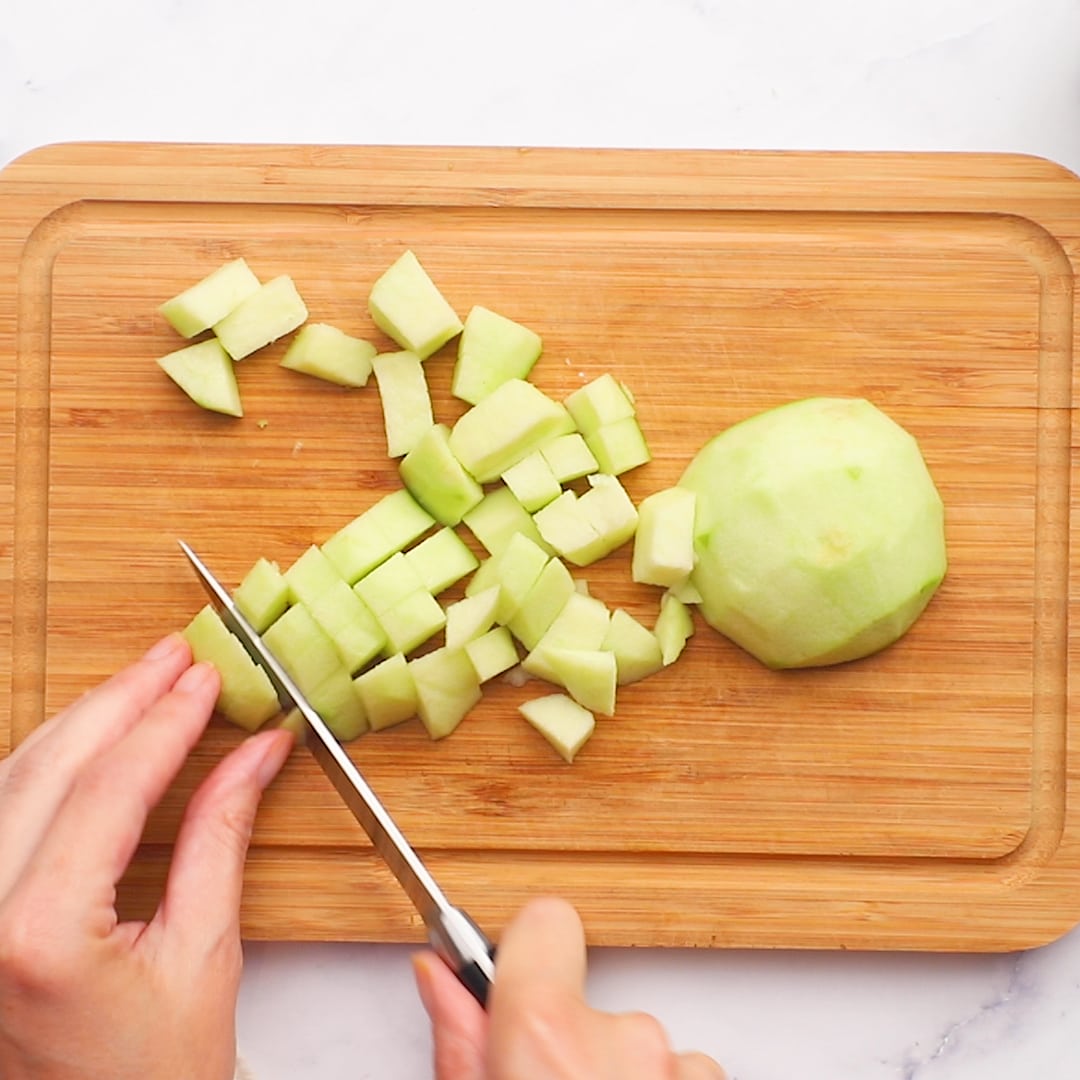
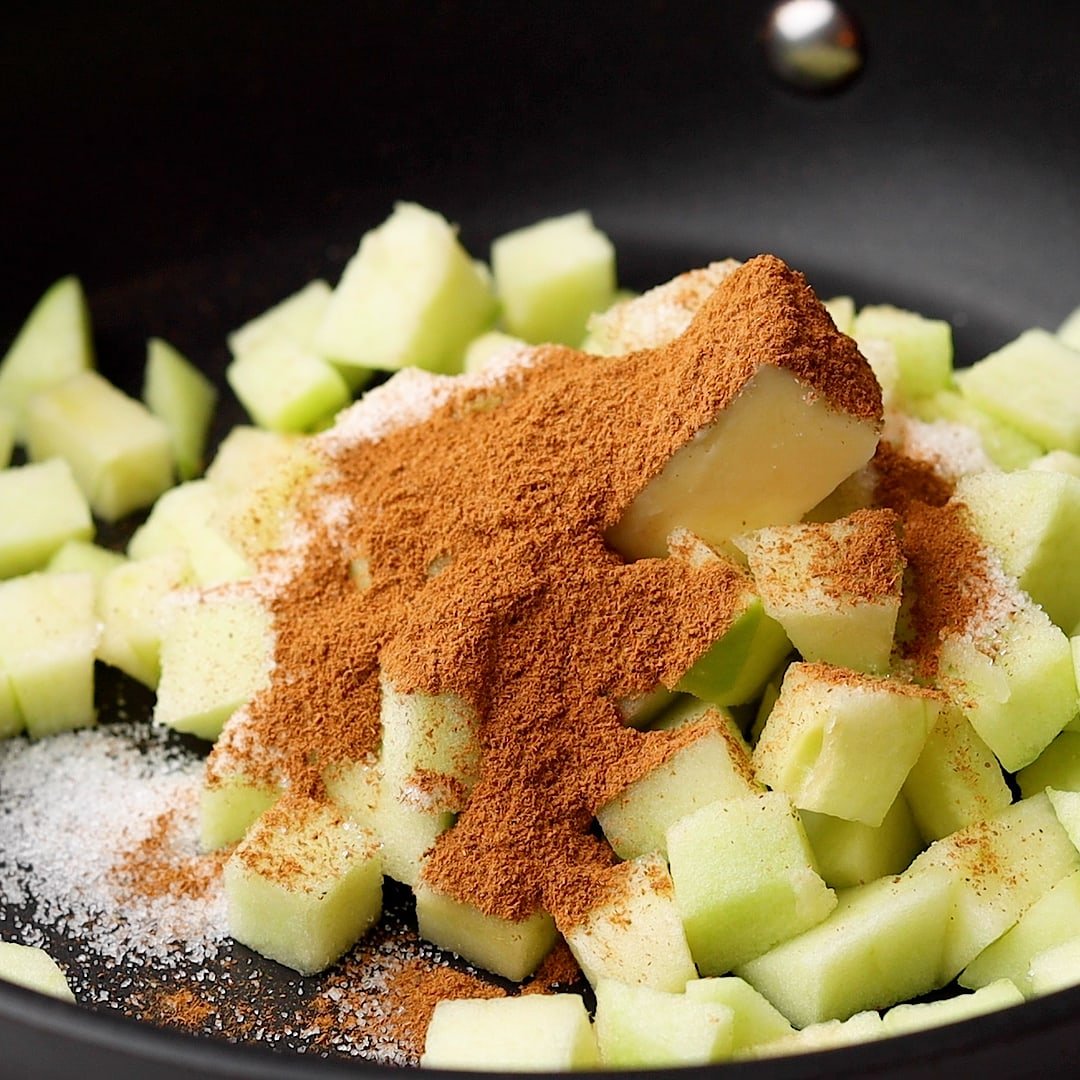
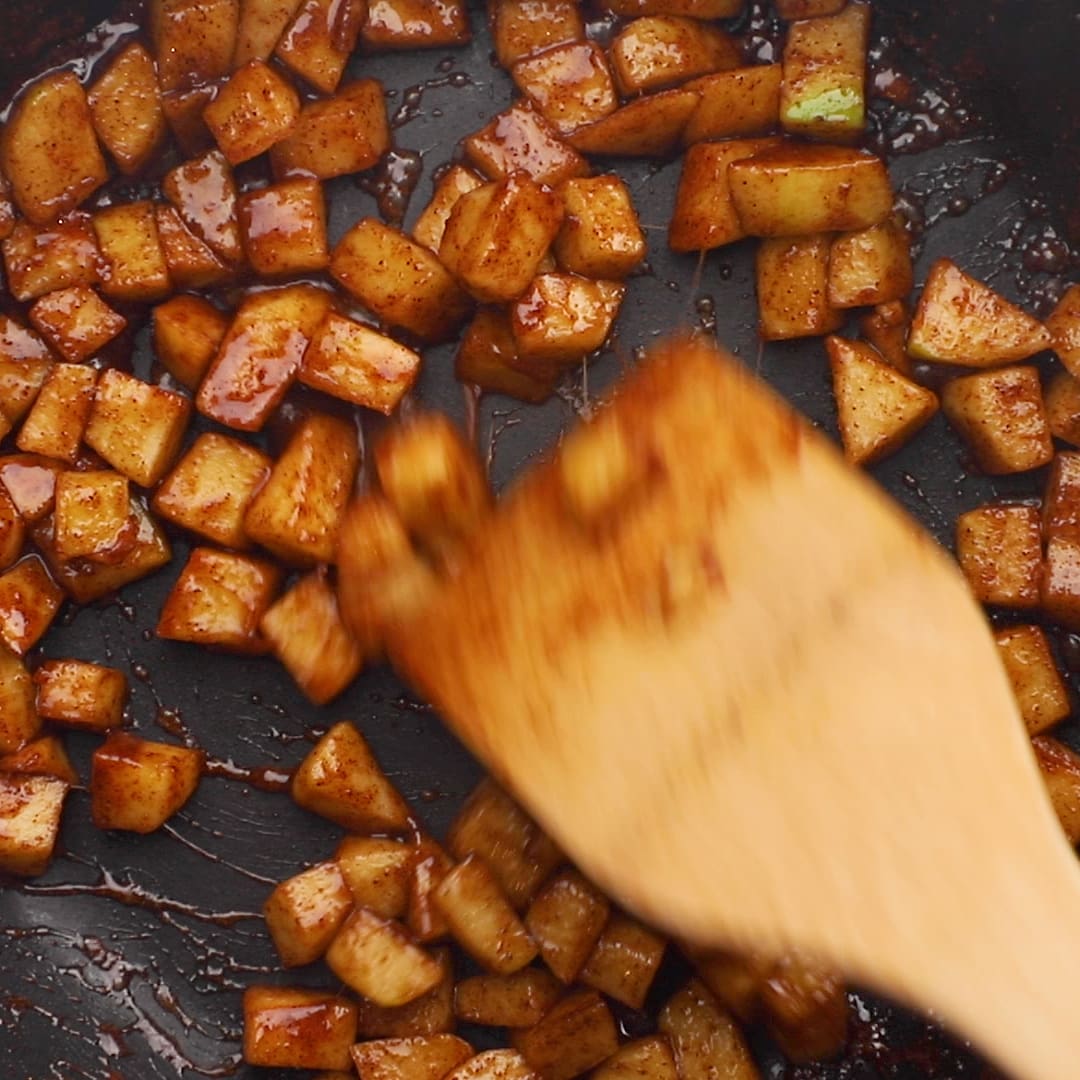
What to look for: apples should still hold their shape but be mostly soft. You want them to hold together in the actual apple fritter after it’s been fried.
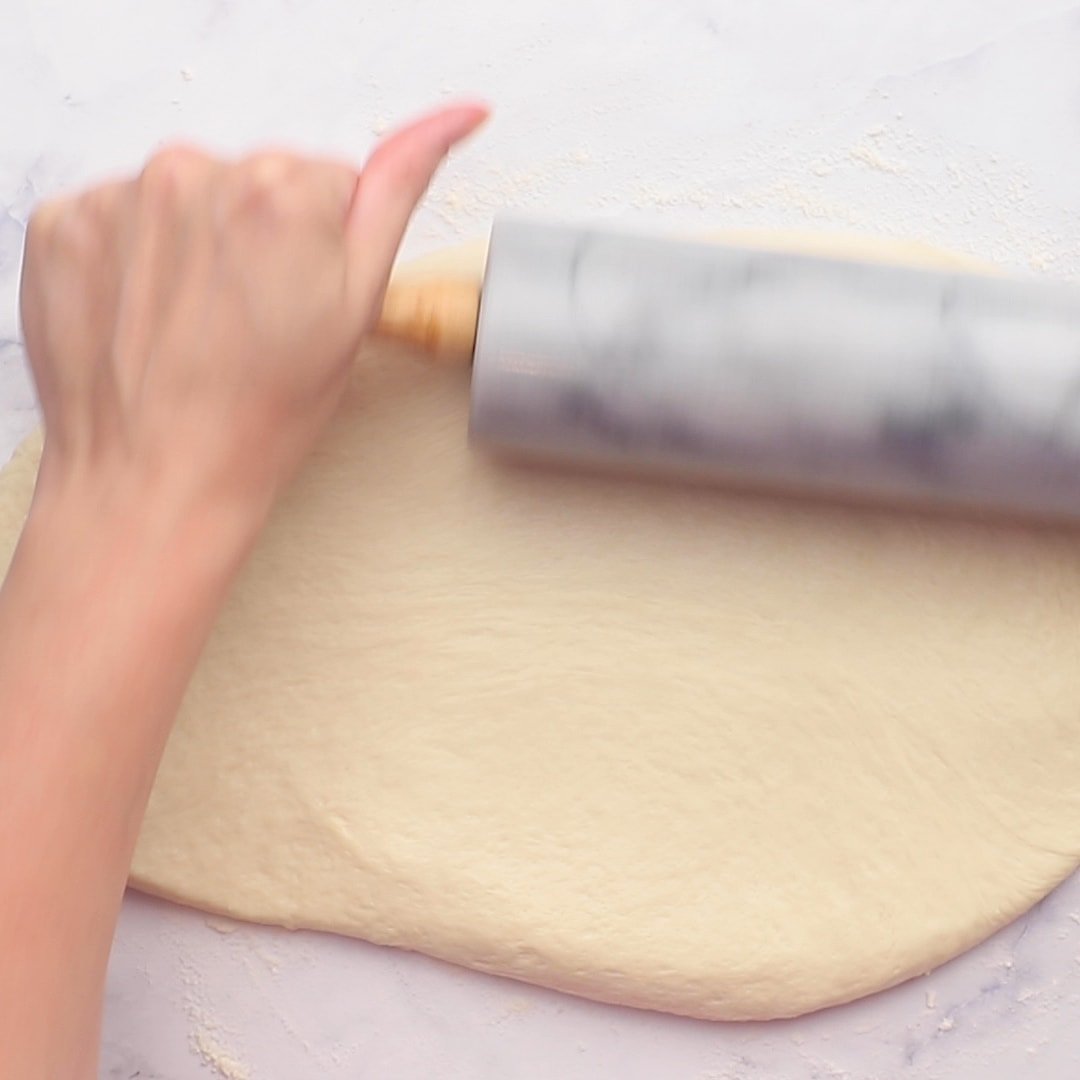
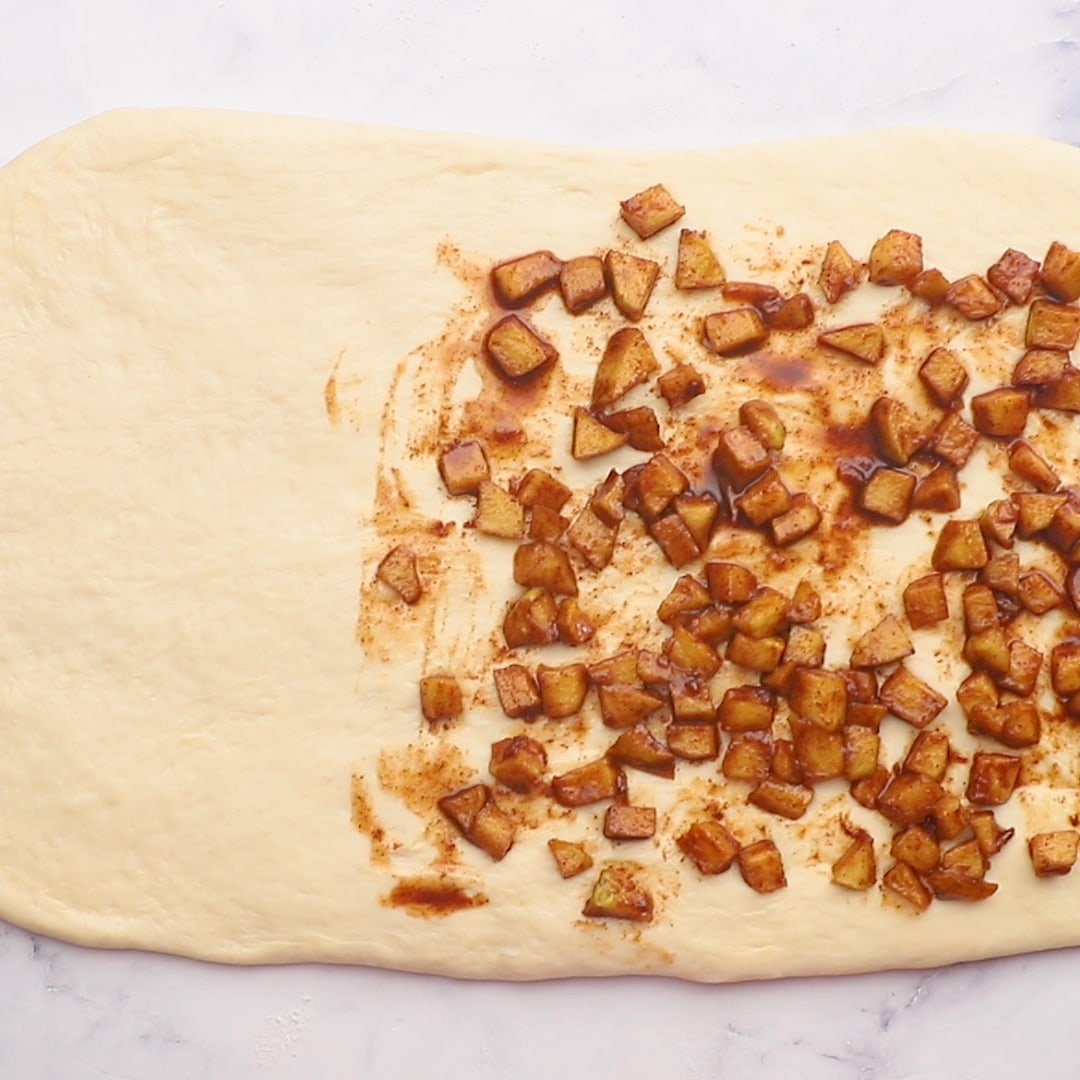
3. Form the Apple Fritters
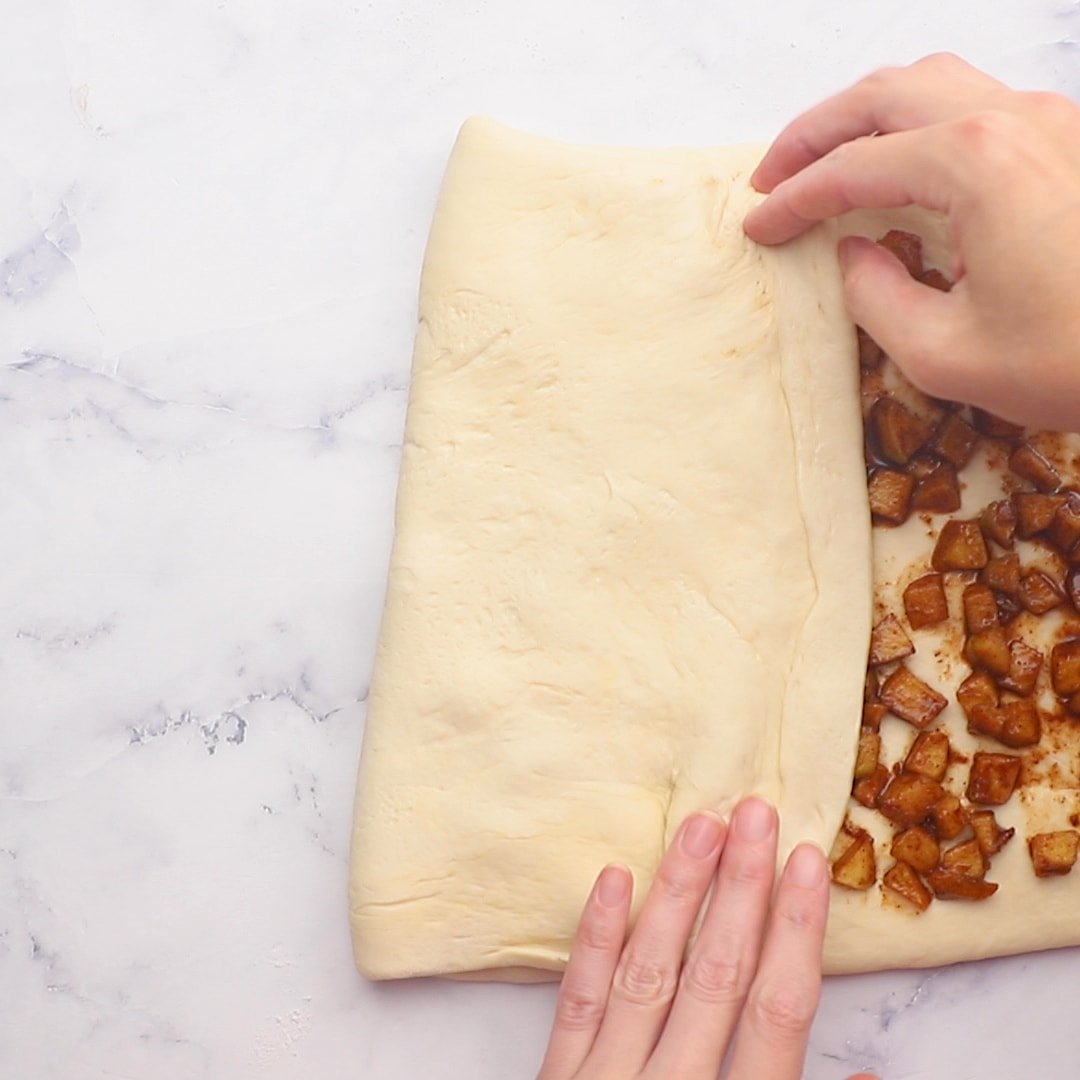
Flour a clean work surface and roll the dough somewhere between a rough rectangle and oval. Spread cooked apples onto 2/3rds of the rolled dough. Fold it into thirds to create three layers. Press the stack together gently.
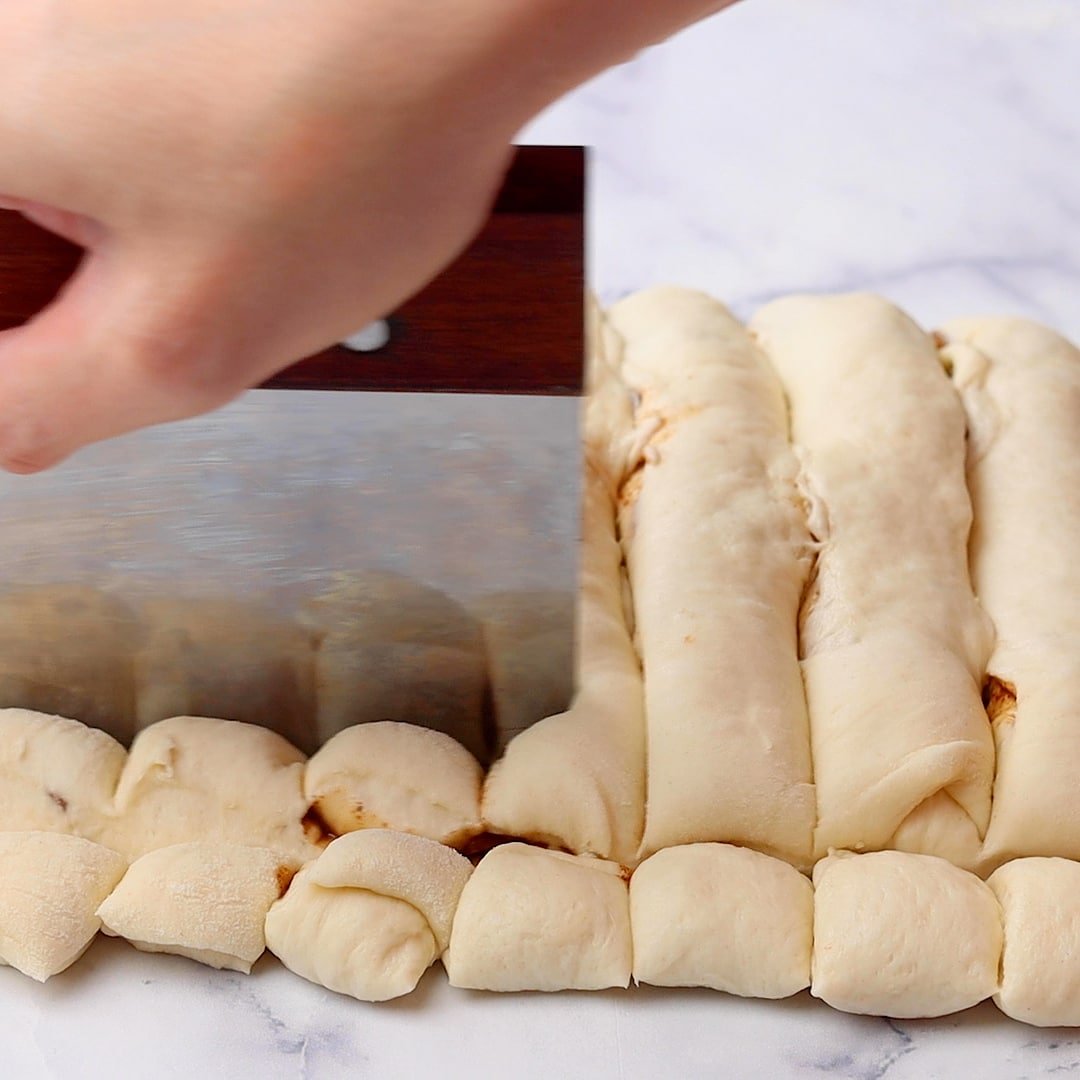
4. The Donut Shop Secret for Making the Perfect Apple Fritter
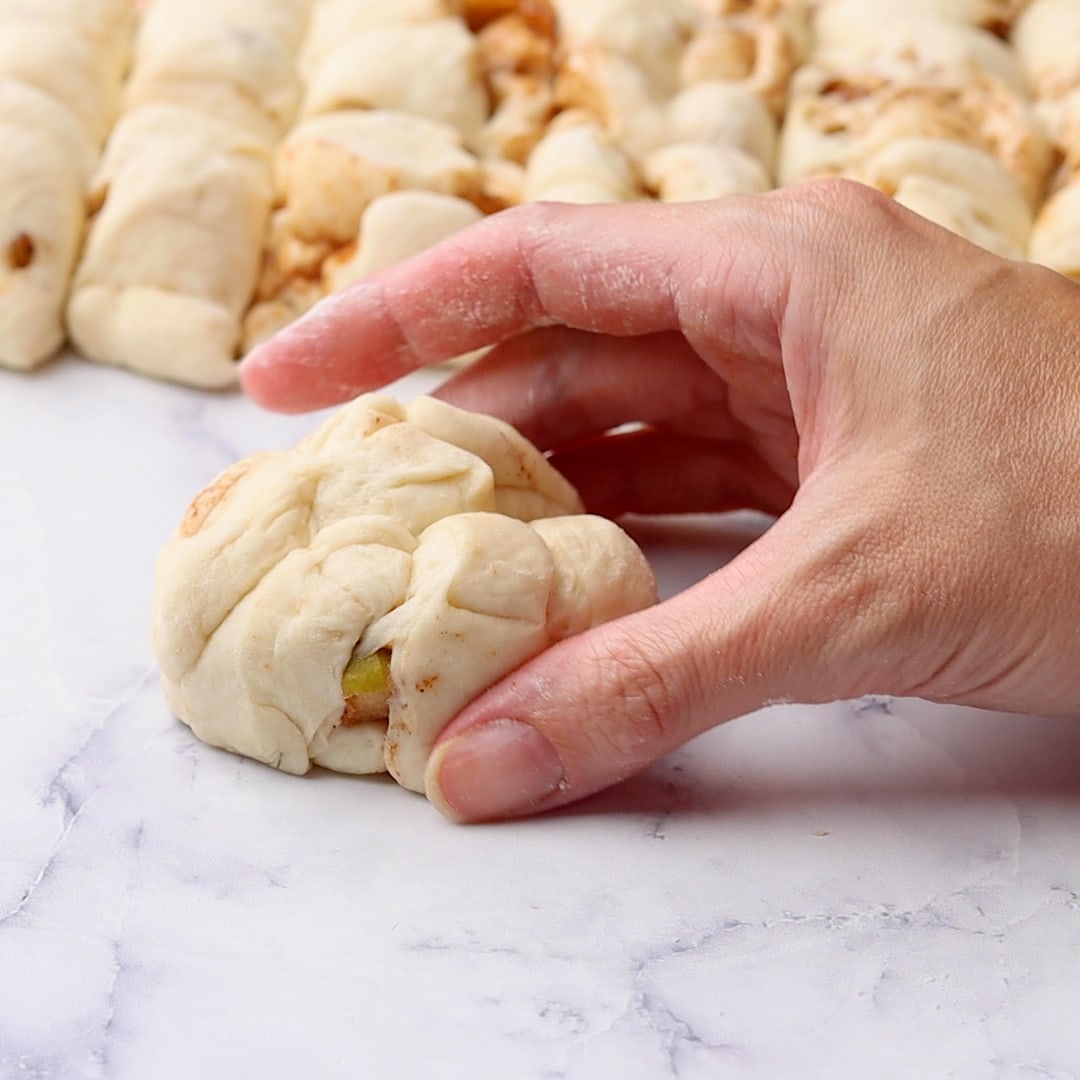
I know this seems like a weird step, but it’s what gives the fritters that signature look. Using a sharp knife or bench scraper, cut filled dough into small 1/2 inch pieces. Then press those pieces into a log to try to stick them back together. I know it seems like counter intuitive to cut it all apart and then stick it back together but this is where the magic happens! I promise it will all make sense in the end.
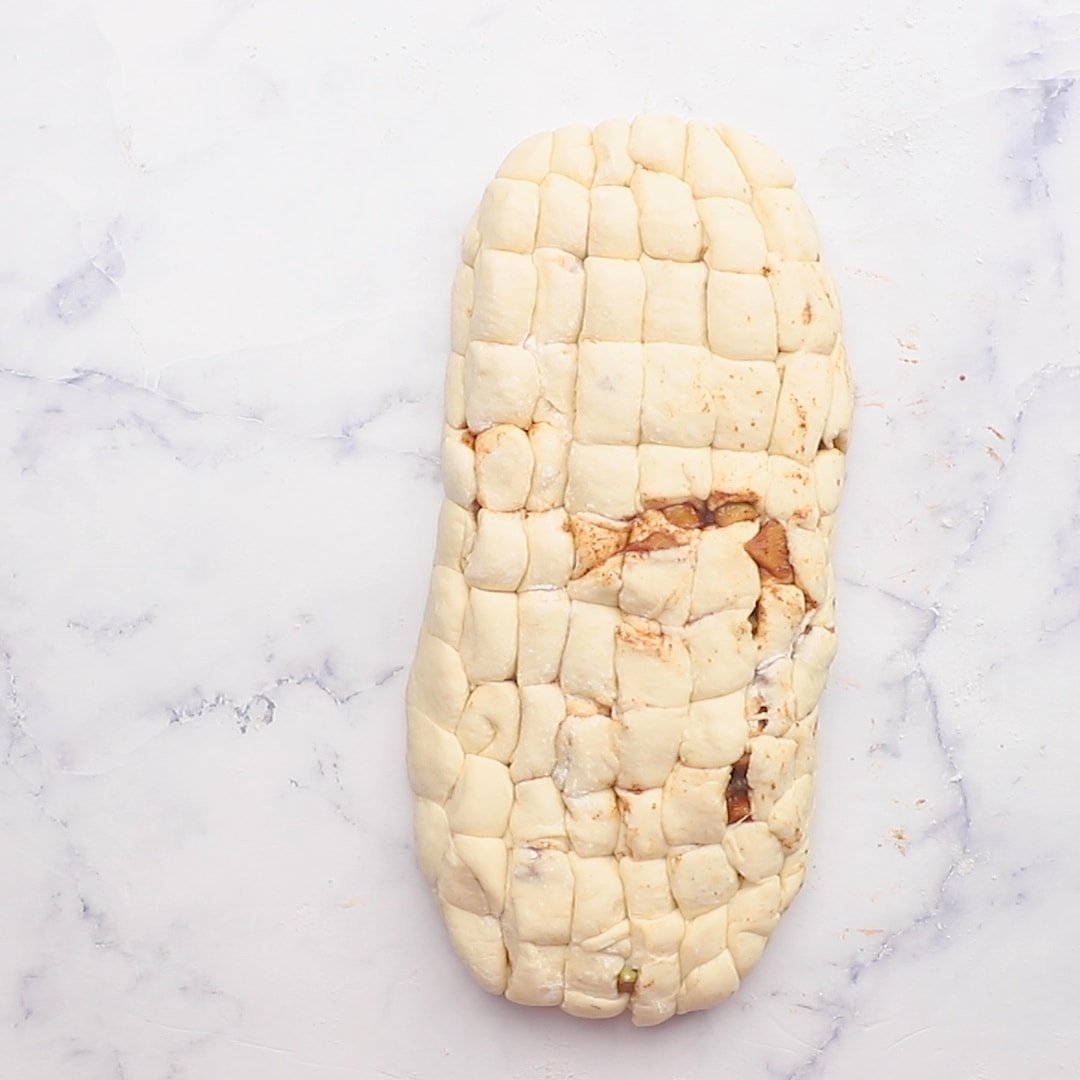
Once your log has formed, cut into 8 equal portions. Press each fritter together so it won’t fall apart in the fryer. Set aside for 15-20 minutes to rise slightly while the oil heats up.
5. Fry the Fritters
Add vegetable oil or canola oil to a deep heavy bottomed pot fitted with a candy thermometer. You want at least 3 inches of oil in the pot. Heat over medium-high heat to get the oil to hold steady at 375° F. Anywhere between 360° and 380° F is fine, but keep in mind the oil temperature will go down with the addition of the fritters and you will have to adjust. Add two or three donuts to the hot oil and fry 1 minute per side. Remove fried apple fritters from the oil with a slotted spoon and drain on paper towels.
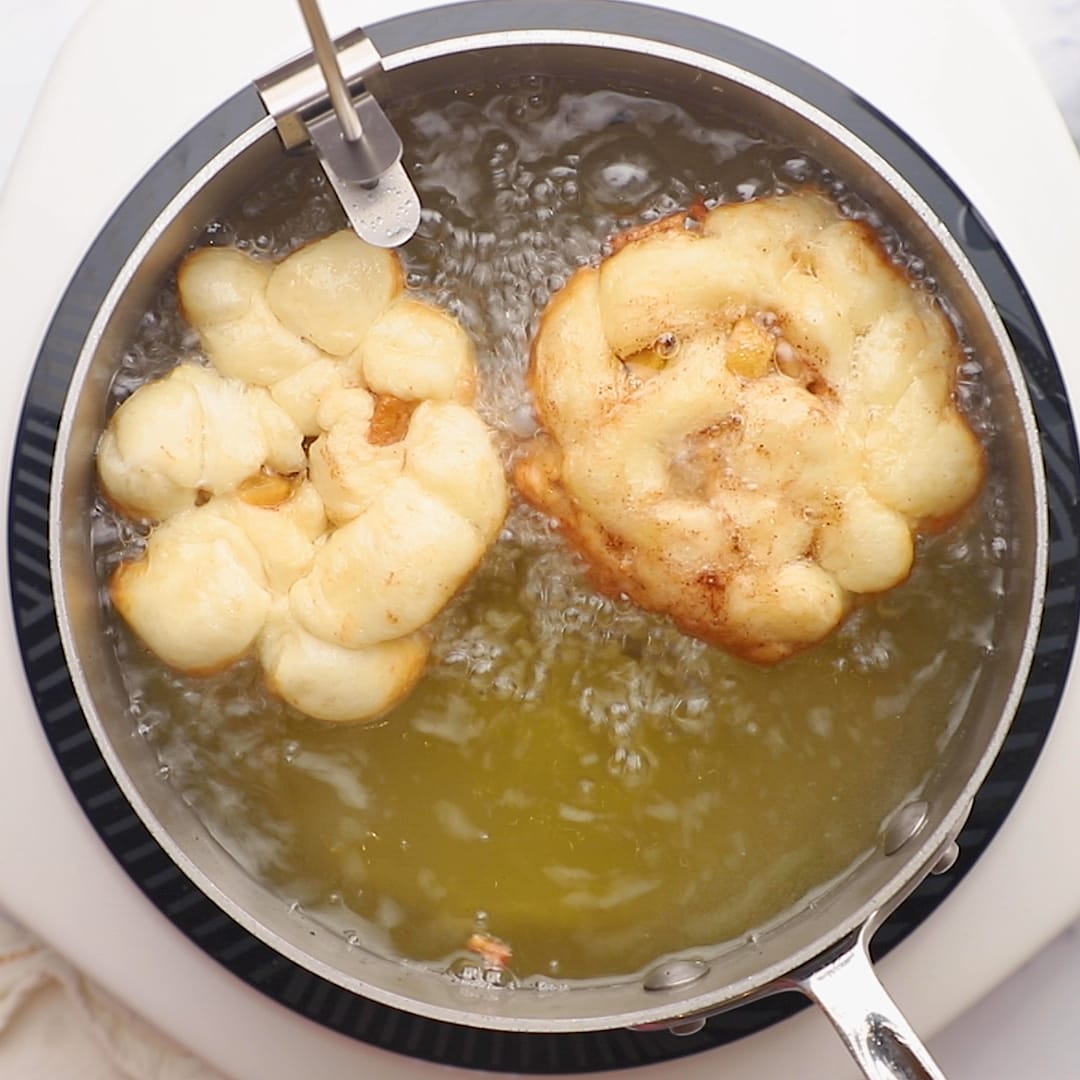
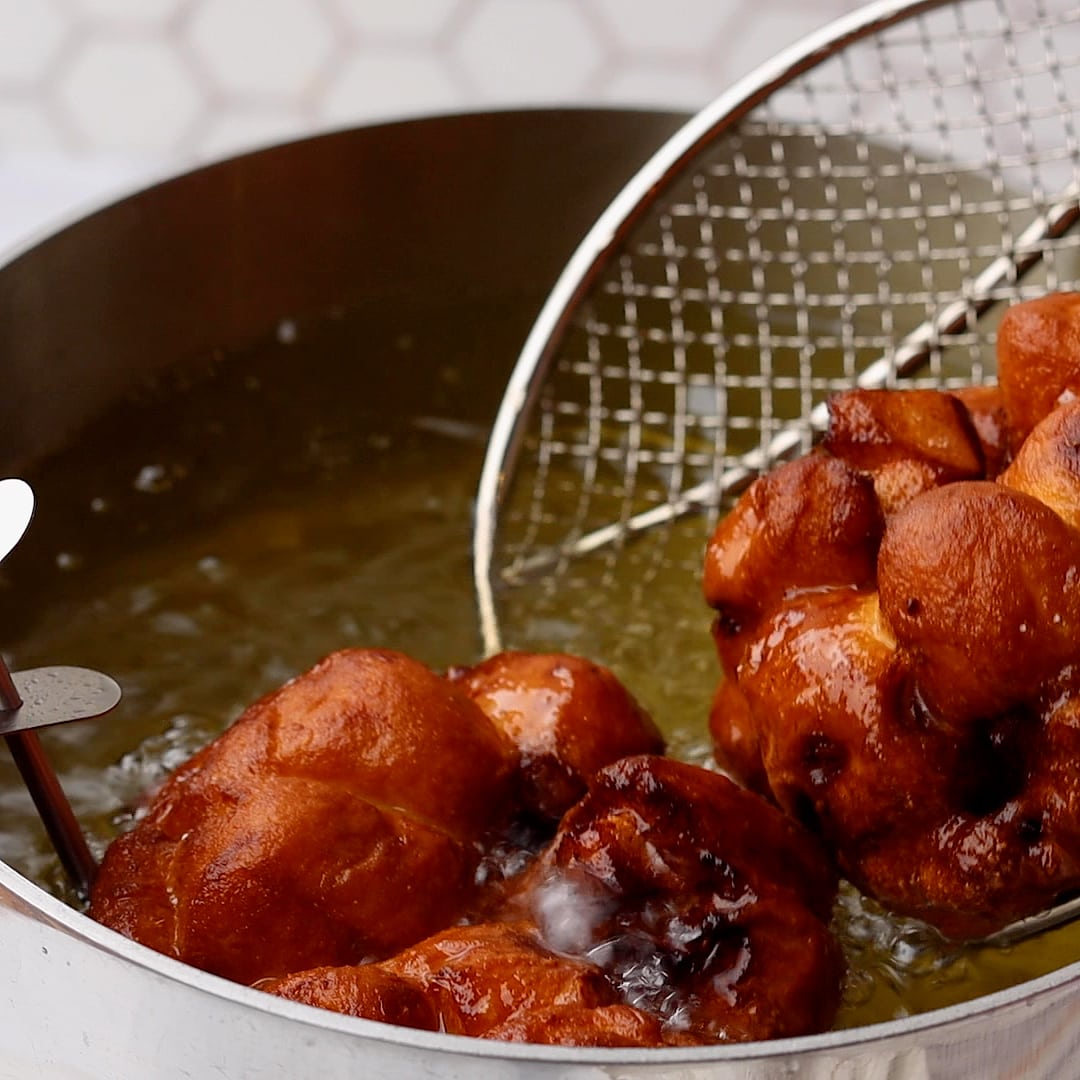
What to look for: Apple Fritters are done when they float to the top and are a deep golden brown color on both sides.
6. Finish with a Glaze
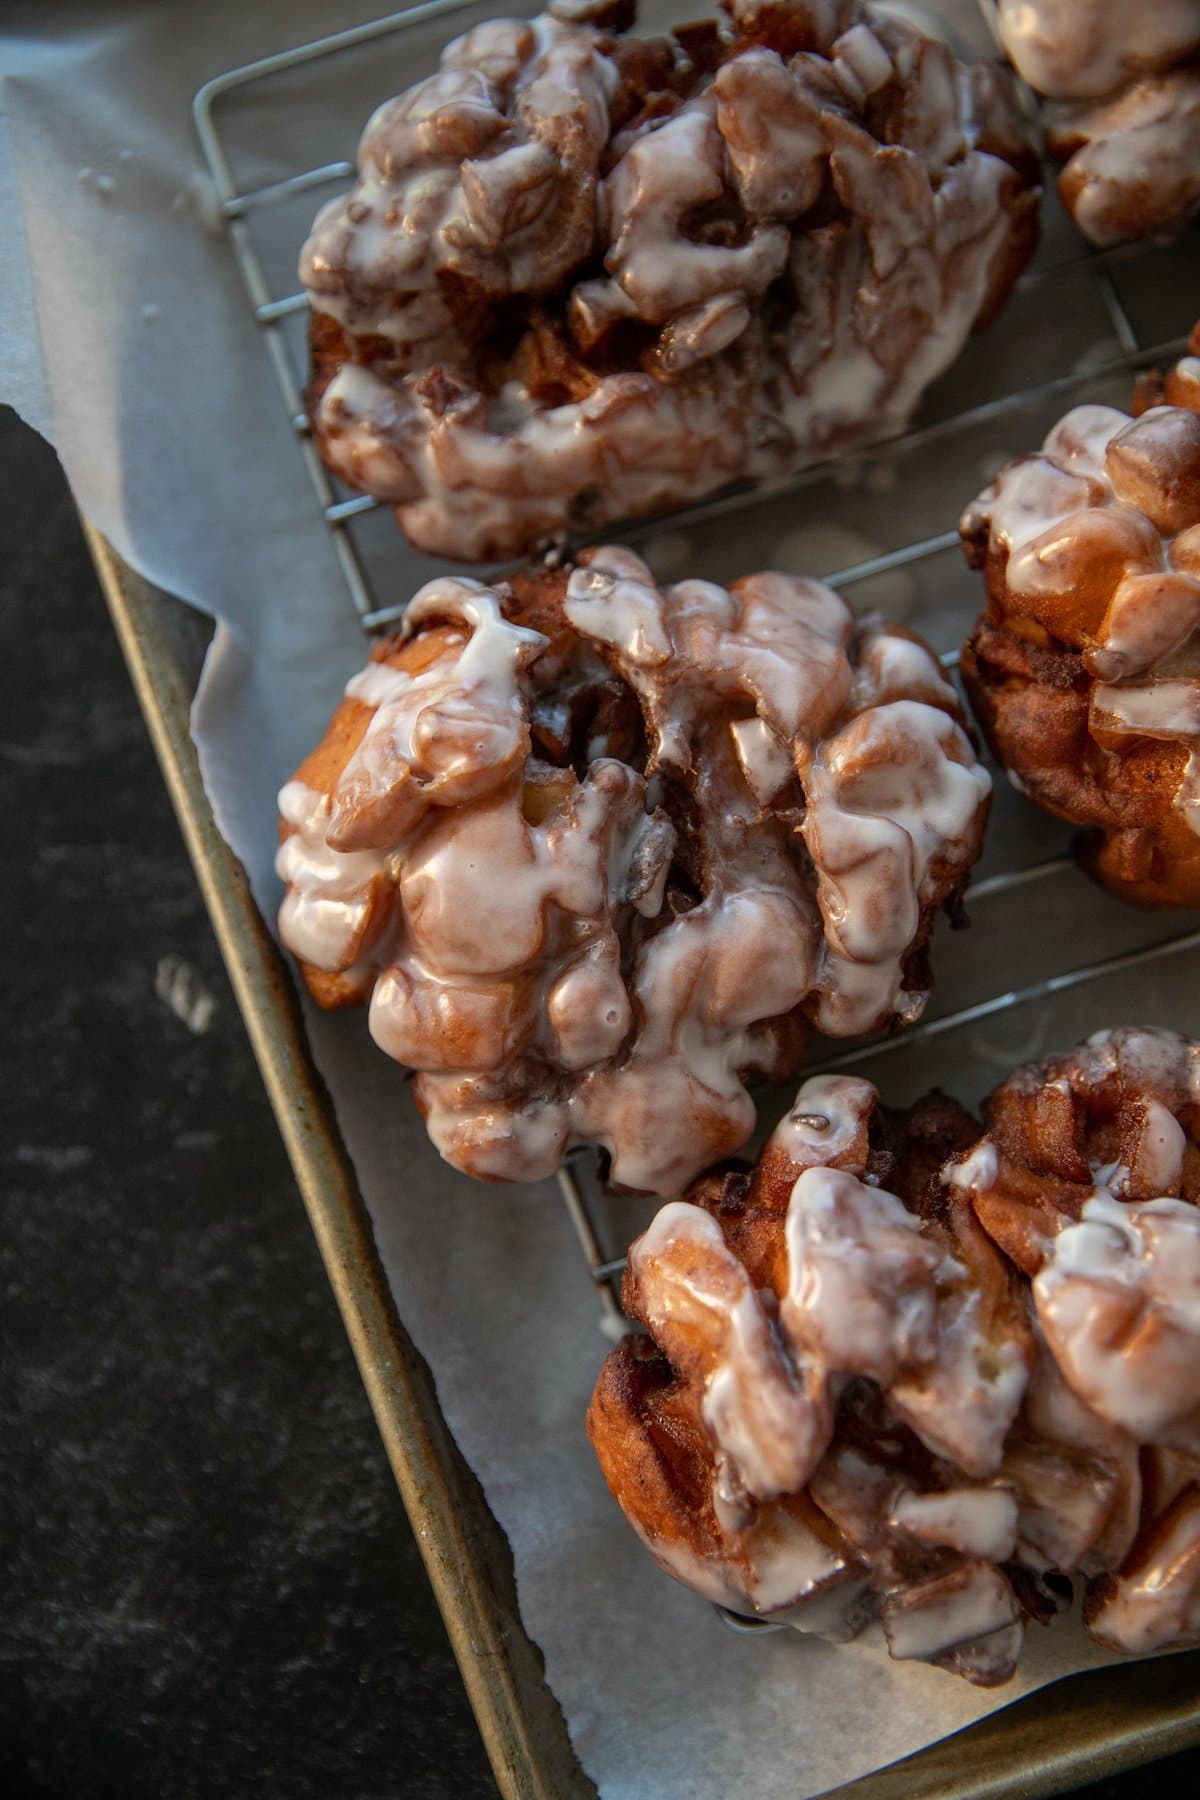
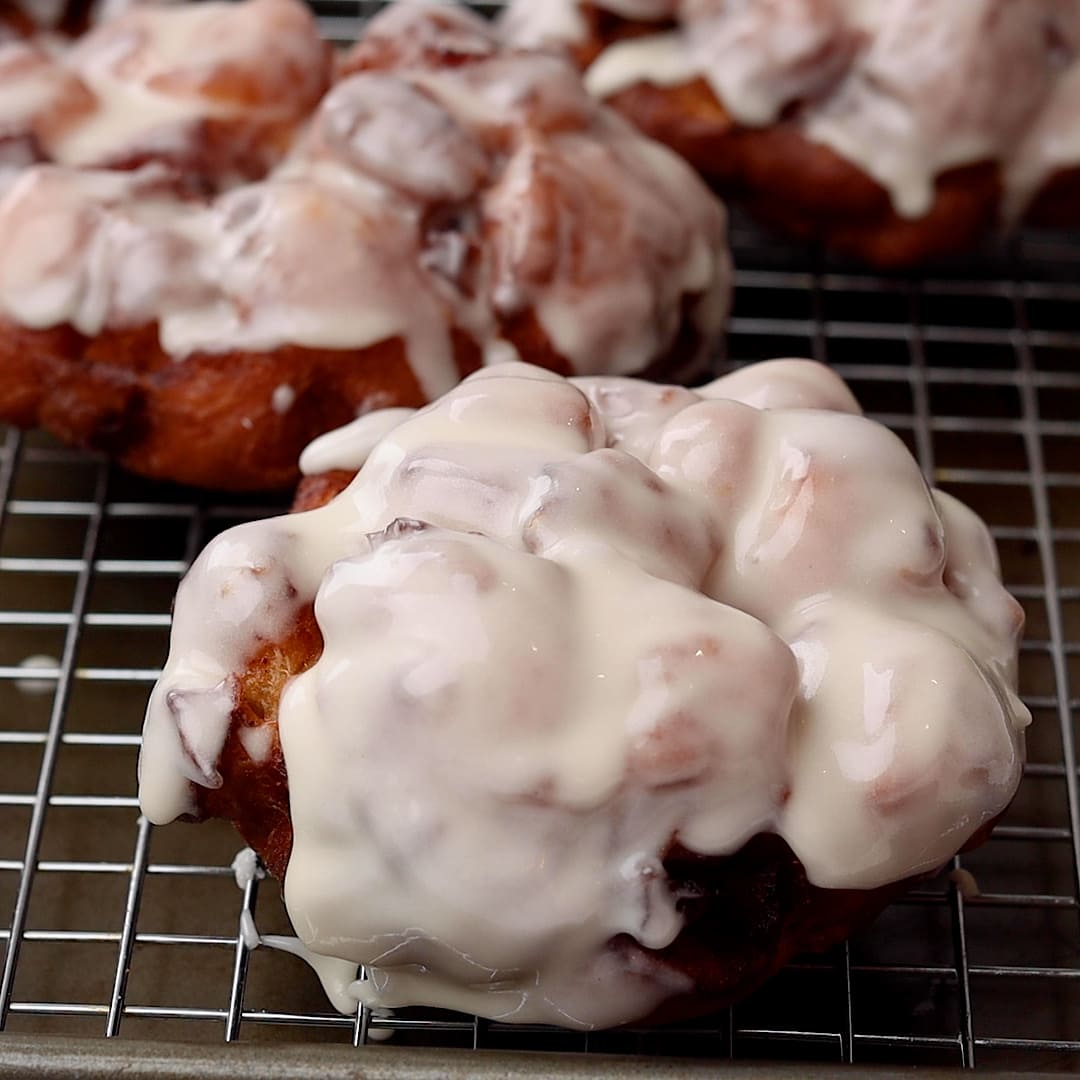
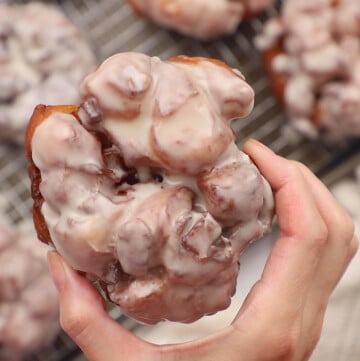
Whisk all the ingredients for the glaze together, adding more milk as needed to get the consistency you want. Dip the tops of the warm apple fritters into the glaze and place onto a wire rack to let it drip down. Enjoy warm or at room temperature.
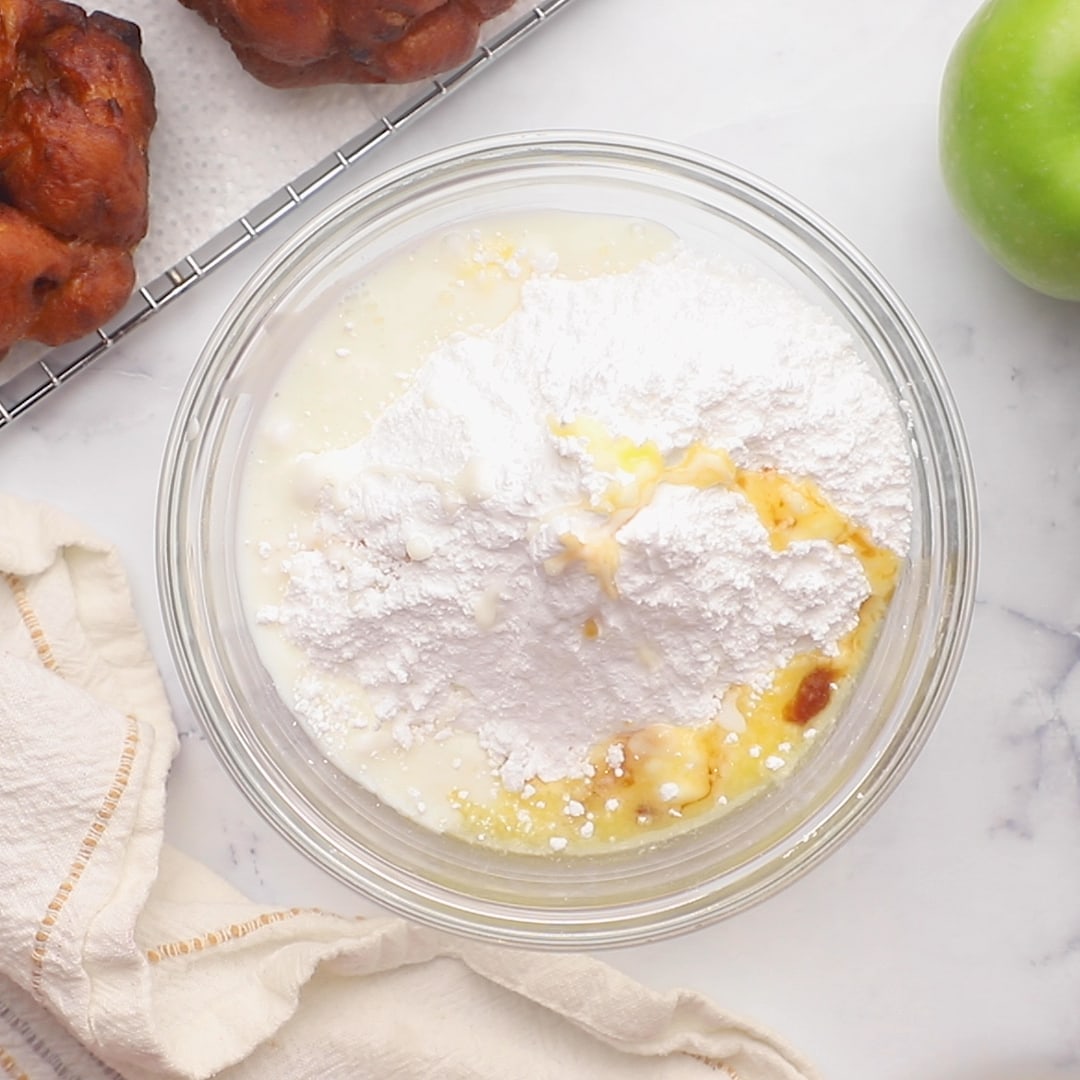
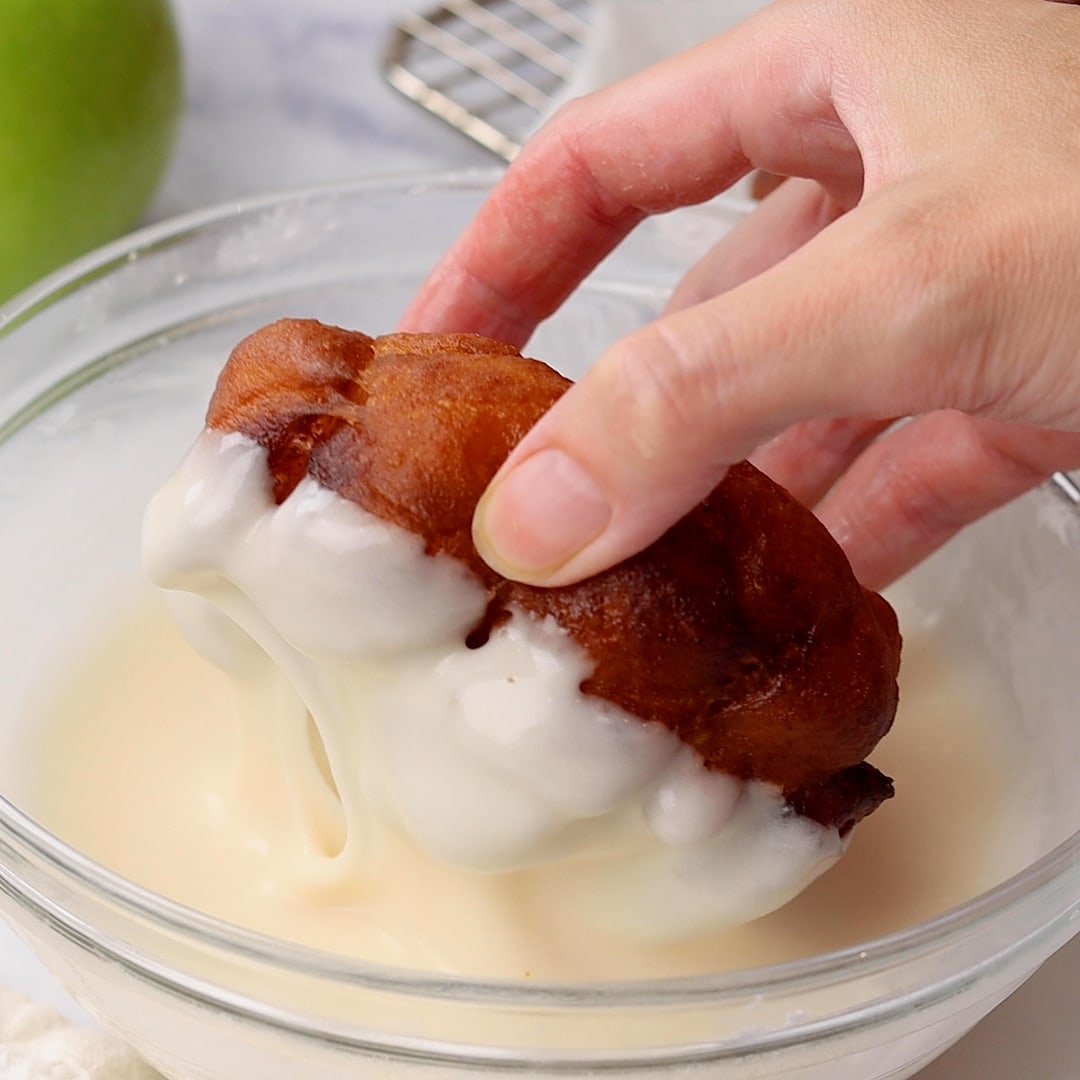
Pro Tip: keep in mind the warmer the donut when you dip it in the glaze the less white the glaze will appear. If you want the glaze to be more obvious, dip them when they are warm to the touch and easy to handle, not hot.
Storing Apple Fritters
Just like store-bought donuts, the homemade versions don’t taste very good the next day and are better eaten fresh within 18 hours of making them. If you are going to store them, make sure they are on a plate or in a box, gently covered with foil or plastic wrap or in an airtight container. You can absolutely reheat in the microwave 10 seconds to bring a little life back to them the next day, but would highly recommend enjoying immediately.
Removing that Fry Smell From Your House
If the smell of fried foods is preventing you from making anything fried (kettle chips, pumpkin donuts, fries) – never fear! I am here! A big reason the smell lingers is because that oil is still around. Here is how I get rid of that fried smell as fast as I can:
- After I’m done frying, I keep the hot oil in the dutch oven or pot I used, covered with a lid to cool completely to room temperature.
- During this time I will wash any utensils, dishes, the counter and the stove that had oil on it. I will also open a window or two if its not too cold outside.
- Once the oil is at room temperature, I use a funnel and pour it into a sealable plastic container. (Not plastic bags, an actual container.) I will typically use a full 48 oz bottle of oil for frying, so I will pour the used oil back into that same container. Seal with the lid tightly.
- Some people keep this oil to be their frying oil, but I don’t eat fried food enough to keep it, so I usually just toss it.
- Wash the pot 2-3 times to get rid of all the oil and any greasy residue.
- Voila! A non-stinky house! It really does come down to getting rid of that oil as soon as possible.
More Apple Recipes to Try!
Tis the season for all things apple! Here are a few tasty options my readers love:
- Old Fashioned Apple Cake
- Apple Pie
- Oven Dried Apples
- Apple Oatmeal Cookies (with brown butter frosting)
- Apple Turnovers
- Homemade Apple Cider
Be sure to check out my full apple recipe archive for salad, snack, dinner and dessert options that are all perfect for Fall! Anyways, I hope you LOVE this recipe and enjoy some amazing and fresh Apple Fritters at home this season.
If you make this recipe, I would really appreciate it if you would give it a star rating and leave your review in the comments! If you have a picture of your finished dish, post it on Instagram using the hashtag #laurenslatest and tagging me @laurens_latest.


No comments:
Post a Comment